Here on my blog, I have written different WordPress installation guides. You can check, how to install WordPress on a VPS server with the Plesk panel. We’ve also seen how we can install WordPress on Cyberpanel. Today let’s see how to install WordPress on Contabo VPS without cPanel, Cyberpanel, or Plesk and your popular freemium and premium control panels. This tutorial can be applied to any VPS company, I was just using Contabo here.
In this guide, I’ll show you how to configure your Contabo VPS with the right server architecture to get your server up and running without having to install the server requirements singly. We’ll configure LAMP Stack on our Linux VPS. This is really going to save us time by instantly installing all our server requirements like APACHE, MYSQL, PHP, and all the necessary PHP modules needed to run our site successfully.
Without wasting much of our time let’s get to work and see how to install WordPress on Contabo VPS without cpanel. Ready?? Let’s goooooo
Requirements to install WordPress on Contabo VPS without cPanel
The following are the few things we need:
- A domain name
- Contabo VPS with root access
- SSH client (e.g. PuTTY)
- LAMP stack (Linux, Apache, MySQL, PHP)
- WordPress
Getting a domain name
A domain name is simply the address of your website. While hosting can be visualized as the plot of land where you build your house, getting a domain name is pretty simple and I believe we won’t waste much time here. Just go to any domain registrar at all like Namecheap, GoDaddy, Bluehost, etc, and buy your domain name. But, if you want to follow me religiously, I am going with Namecheap. You can get it too and follow along.
Note: You can use any domain registrar of your choice. The processes are all the same. Also, ensure any domain registrar you’re going with allows you access to the DNS management zone of your domains. Your domain got?? Let’s continue…..🫶🫶🫶
Getting Contabo VPS to install WordPress
Over the years there has been a swift transition from shared hosting to VPS and dedicated server hosting. The question is what is shared hosting, what are VPS and dedicated server hosting and which one is the best option for your hosting needs? And most importantly Why do we have to go with VPS other than other options available for us? Let’s see below …….
What is shared hosting?
This is simply hosting your websites or website with like: Bluehost, DreamHost, hostwinds, Namecheap, wp engine, cloudways, scalahosting, webhostingpad and other popular hosting you can think of. Most of these companies have grown to add VPS and dedicated server hosting options to their hosting plans.
Above we did not even explain what is shared hosting 😃😃. Let’s go this way, shared hosting simply means you have hundreds to thousands of other websites hosted on the same server or hosting machine as you. The implication of this is an averagely slower server, though that isn’t necessarily the case, as some shared hosting is still supersonically fast. So, to keep things simple, in shared hosting you don’t have control over the server, you don’t have control over critically important issues like the SEO. One person’s action might affect all websites on the server since you aren’t the only one on that server. This is mostly what people go for because it is simply very affordable.
Check out our top shared hosting deals for the best-shared hosting choice for your business.
What is VPS hosting?
VPS is short for virtual private servers. Unlike shared hosting, you are the only person that has this server. The implication is that you’ll have only your site or sites on it unless you want to help a friend host their site by adding their site to your VPS Hosting. You catch the drift 👍👍👍
What is dedicated server Hosting?
To better understand what a dedicated server is, let’s see what ChatGpt has in stock for us. Look at the picture below, it perfectly explained everything in a very simple-easy-to-understand manner.
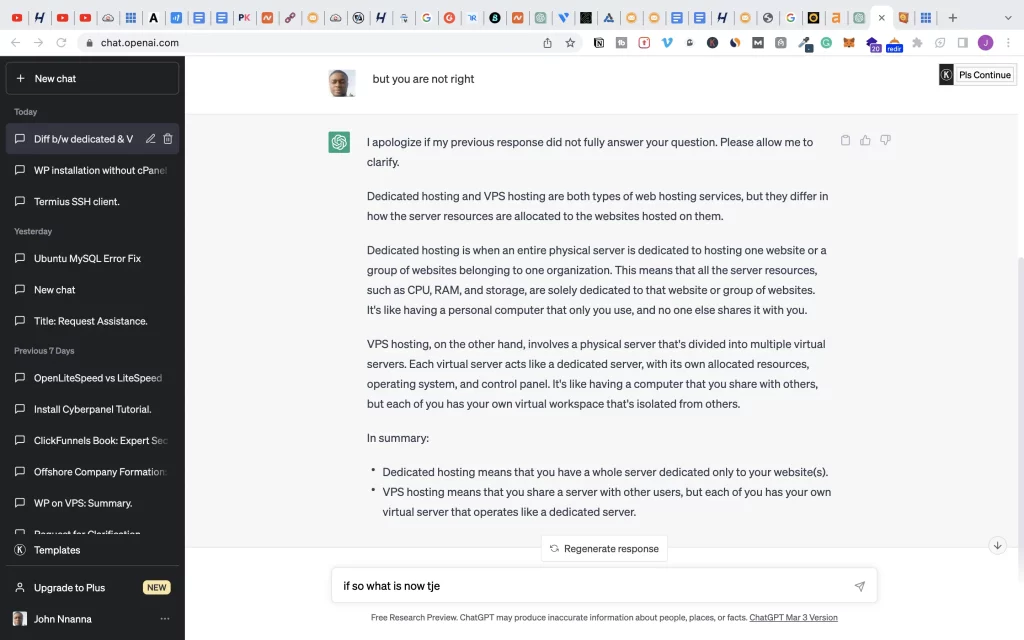
From the explanation above it can be understood that dedicated hosting is an advanced form of VPS hosting. Also, we can see the relationship between dedicated hosting, VPS hosting, and shared hosting. From the spectrum of server resource allocation, a dedicated host has an entire physical server allocated to a single individual to host a site. When the physical server is divided into sectional virtual servers, and each virtual section of the resources is allotted to different individuals it is called VPS hosting. And lastly, when each of the sectional virtual servers isn’t managed by one person it is known as shared hosting. I hope the concept is now simple and understood. I always try my best to explain in simple terms. now let’s continue to install WordPress on Contabo VPS ……
Install WordPress on Contabo VPS
Now let’s configure our server with our desired resources on Our Contabo VPS. Pls, let’s take note that there are other VPS companies you can use for this purpose like Vultr, turnkey internet, and any other one you might know.
You may also check our other tutorials on the different ways to install WordPress
let’s now see how we can configure the LAMP stack on our Contabo VPS and save time. Now go to the Contabo website as in below:

If you don’t find this page when you are visiting just navigate to Cloud VPS on Contabo Homepage.
Select the $8.49/month plan and you will see the next page below:

Here we have our 4 vCPU cores, 8 GB RAM, and 50 GB NVMe or 200 GB. Here we will select the location we want our resources to be hosted. In my case here I chose Germany. You might have to pay an extra $$ if you aren’t going with a free location. For my storage, I left it at the default 200 GB because I think it is more than enough storage resources for us to install WordPress.
Installing LAMP Stack
Scroll to the Image section of the page. This is where you will install both your operating system and the LAMP stack. LAMP stands for Linux, Apache, MSQL, and PHP. Installing LAMP will get all the server requirements you need to install WordPress on contabo VPS or any VPS provider all you are working with.

Here, select LAMP on Ubuntu 18.04. Note that you can actually choose later versions of Ubuntu but version 18.04 is somewhat stable. Scroll down and define your root password. Hit the next button and check out your order. In 1hr to 24hrs, the Contabo team will set up your server configurations for you.
Note: The same process applies to Vultr if you’re working with the Vultr VPS. Let’s see for a moment…..,
LAMP Configuration On Vultr.
Just head on to VULTR and you’ll be brought to this homepage after sign up:

Navigate to Products, hover over the plus icon, and click on Deploy New Server.

Select cloud Compute, Your CPU & storage technology, and server location.
Configuring LAMP Stack
Go to the server Image, and select Market Place Apps. Then on the search field search for LAMP.
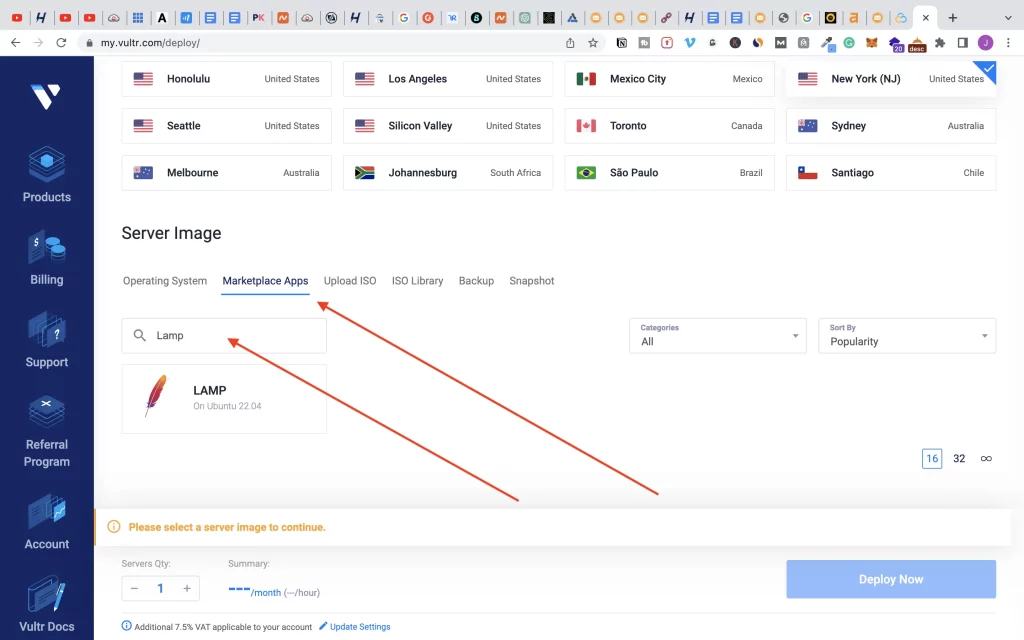
As of the time of writing this tutorial, only Ubuntu 22.04 is available on Vultr. Go down the page and input your password and hostname, which is basically the domain name of the subdomain where you want to install WordPress. Also, select your storage size. I selected the $6 plan being 25 GB NVMe or 100 GB.
Once you are done just click on Deploy Now and vultr will install your configurations in 2 minutes. Let’s map our domain to the VPS server…..
Mapping Domain to VPS Server.
I’ve really explained in detail everything about domain mapping in our guide on how to install WordPress on a VPS server with Plesk panel. But, shortly Let me explain, during each of our configurations on either Contabo or Vultr we had to input our domain name also known as Hostname or PTR record depending on the VPS company you are using. What you are actually doing is pointing your VPS IP to your domain name. This is known as VPS Mapping. Now I can say that domain mapping is the opposite of VPS mapping.
Domain mapping is the process of pointing your domain name back to your VPS IP. Though this isn’t a requirement for web servers, unlike email servers. But we got to configure it anyways if we really want to access our WordPress site with our domain name and not just our VPS IP address. This also serves as a verification step to confirm to web servers that we are the real owners of the domain name since anyone can configure any domain or hostname including facebook.com during the VPS configuration. So, it is summarily safe to say that domain mapping just confirms our identity as real owners of the domain to allow us to access our site through our domain and not necessarily through the IP address. Hope you got the point now. Now let us map our domain…,
Configure your DNS records
Login to any domain registrar at all you are using. Manage the particular domain you wanna point to. Locate the DNS zone of the domain, in my case Advanced DNS since I am using Namecheap.

Select an A record. Put @ at the host field and your VPS IP in the value section, then click save changes.
Congratulations you’ve just done your domain mapping. Let’s now swiftly install WordPress on Contabo VPS.
Install WordPress on Contabo VPS
We’ve configured our server and mapped our domain. let’s get to work and install WordPress on Contabo VPS.
Connect to your server with any SSH Client like Putty (For window users), Mac terminal for Mac users, or download Termius. And by the way, termius is available for both Mac and Windows. I prefer it because it is an all-in-one software that serves as an SSH client as well as an FTP client. But if you are working with other ssh clients like Putty for Windows users, also get FTP clients like Winscp to help manage your files.

Open termius and add a new host. Put your VPS IP address and password and you will be inside your server command line just like below:
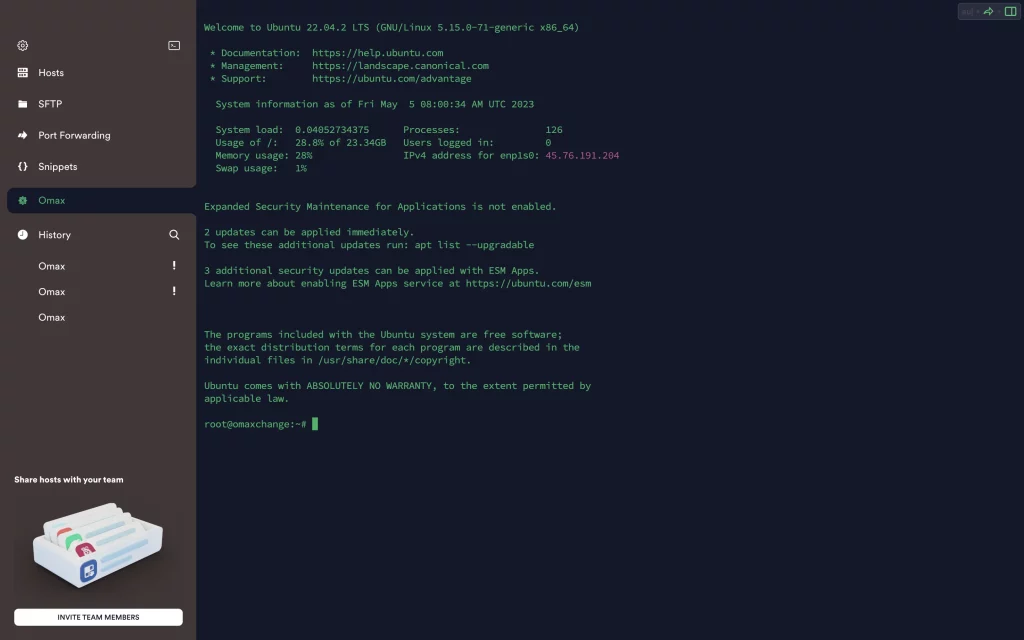
Note: irrespective of the SSL client you are using, you should be brought to the same interface.
Run the command below to clear the screen and work with a fresh clean screen:
clear
The next thing is to create a database to handle our WordPress site.
Creating an MYSQL Database and WordPress user:
MYSQL is an open-source database server or software we can use to manage our WordPress site data, users that registered on the site, and other site information. MYSQL is available on the internet and anyone can download and use it. Although since it is open-source you can tweak it to suit your database need, it does have a public license that defines what you can and cannot do with it in different situations.
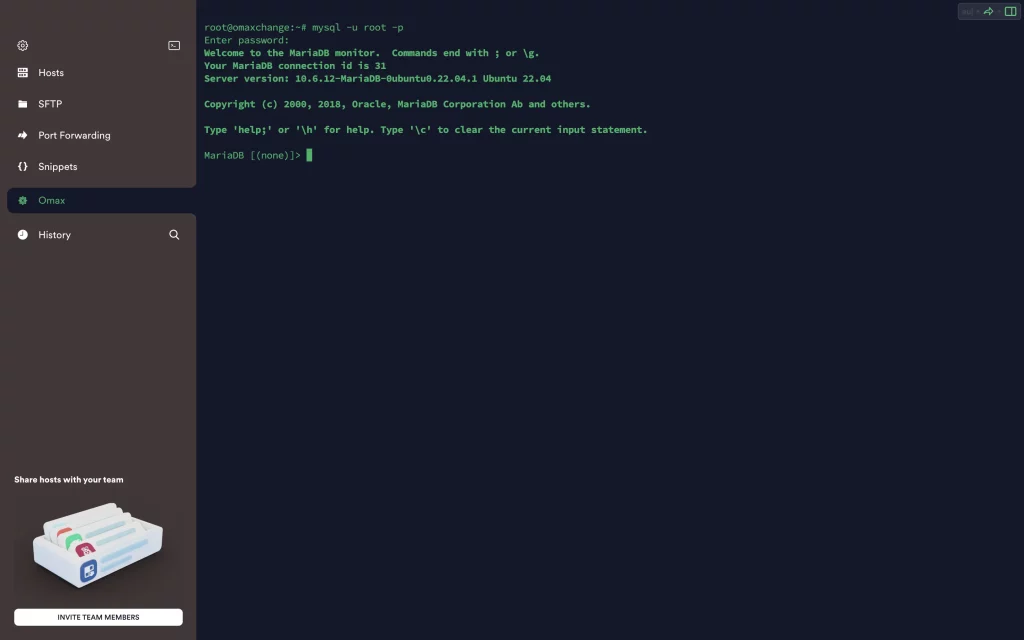
We would have installed this manually by running some complex commands. Since we have installed the LAMP stack; our server already has a MYSQL database server installed. All we have to do now is to log in to MYSQL and create a database to manage our site data. To do that, run the following commands:
mysql -u root -p
Input your VPS server password and you will be inside the MySQL database server.
Create a database by running the following command:
CREATE DATABASE wordpress DEFAULT CHARACTER SET utf8 COLLATE utf8_unicode_ci;
Here I called my own wordpress so that I can remember my database name easily. You can use anything you want for example:
CREATE DATABASE johnee DEFAULT CHARACTER SET utf8 COLLATE utf8_unicode_ci;
I just changed my database name to johnee. You know what? I’ll be using johnee as my database name so that you will see my flexibility. Also, know that any command in the MYSQL server ends with a semi-colon ;
CREATE USER 'wordpressuser'@'localhost' IDENTIFIED BY 'Enter_Your_Password_Here';
Run the following command to create a user to access the database we just created.
CREATE USER 'wordpressuser'@'localhost' IDENTIFIED BY 'Enter_Your_Password_Here';
Here the database user is wordpressuser. Under the quotation mark Put in the password of the user.
GRANT ALL ON johnee.* TO 'wordpressuser'@'localhost' IDENTIFIED BY 'enter_a_custom_password_here';
Run the above command to grant the user wordpressuser all privileges on the database johnee. Under the password quotation, define the user password and run the command.
Congratulations, you now have a database and a user to access the database with all privileges and permissions granted to them to do anything.
FLUSH PRIVILEGES;
Run the above commands to flush all privileges. This reloads the grant table in MYSQL and makes the privileges we granted to take effect.
To exit the database Run:
EXIT;
Great you have just exited the MYSQL server and are now on the root of your VPS server.
Installing Extra PHP Modules
WordPress and many other PHP-powered scripts and plugins leverage extra PHP modules and extensions to run successfully. We can auto-get these modules by running the following commands:
sudo apt update
Run:
sudo apt install php-curl php-gd php-mbstring php-xml php-xmlrpc php-soap php-intl php-zip
Then restart the Apache webserver to reload those modules and extensions by running the following command:
sudo systemctl restart apache2
Download WordPress
Now that our server software is up to date we’ll download and install WordPress now. For security reasons, it is best to download WordPress’s latest version from WordPress.org.
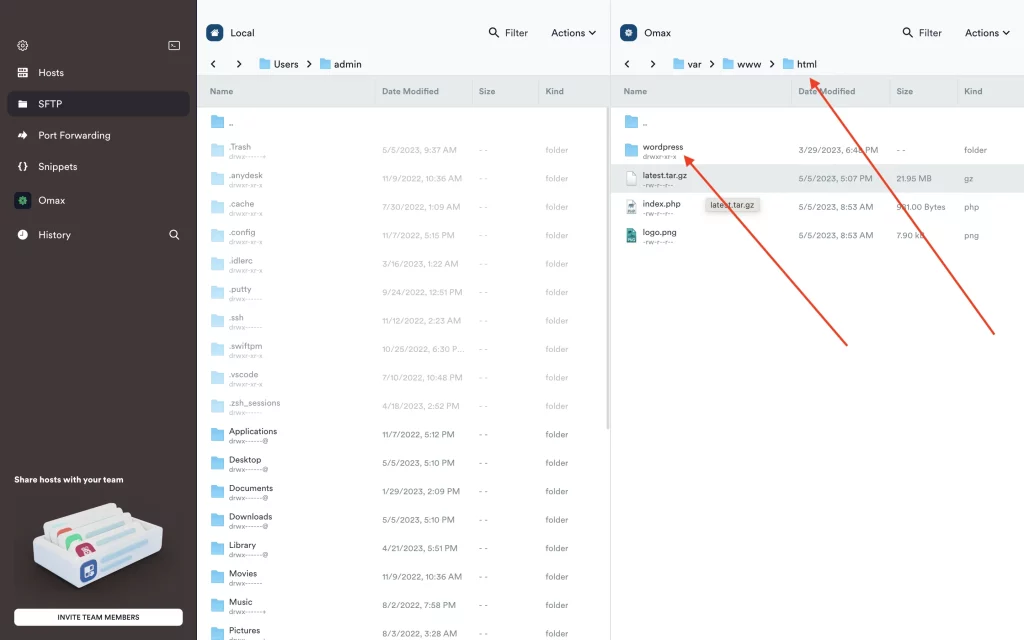
change the current directory to /html by running the following command:
cd /var/www/html
Fetch the latest version of WordPress by running the following command:
curl -O https://wordpress.org/latest.tar.gz
Extract the just downloaded WordPress zip file by running the following command:
tar xzvf latest.tar.gz

All things being equal you will see the above screen, which shows you have created the WordPress folder structure successfully.
Now we have to be very careful here. This is the time to configure more details in our file system. Login to your file system using WinSCP, termius, or any FTP client of your choice.
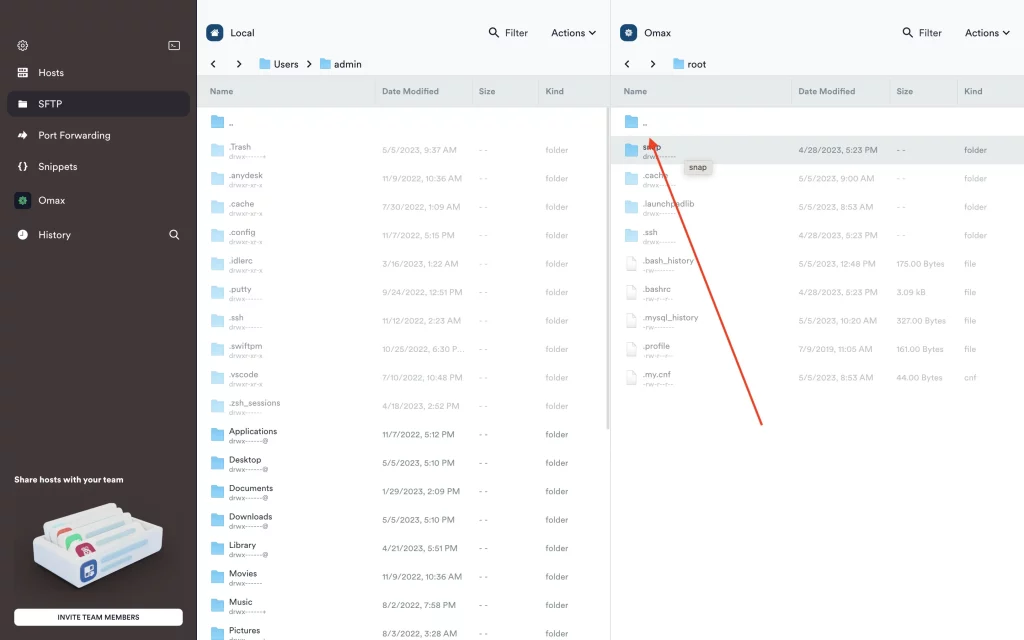
Click on the two-dot and locate the directory var/www/html
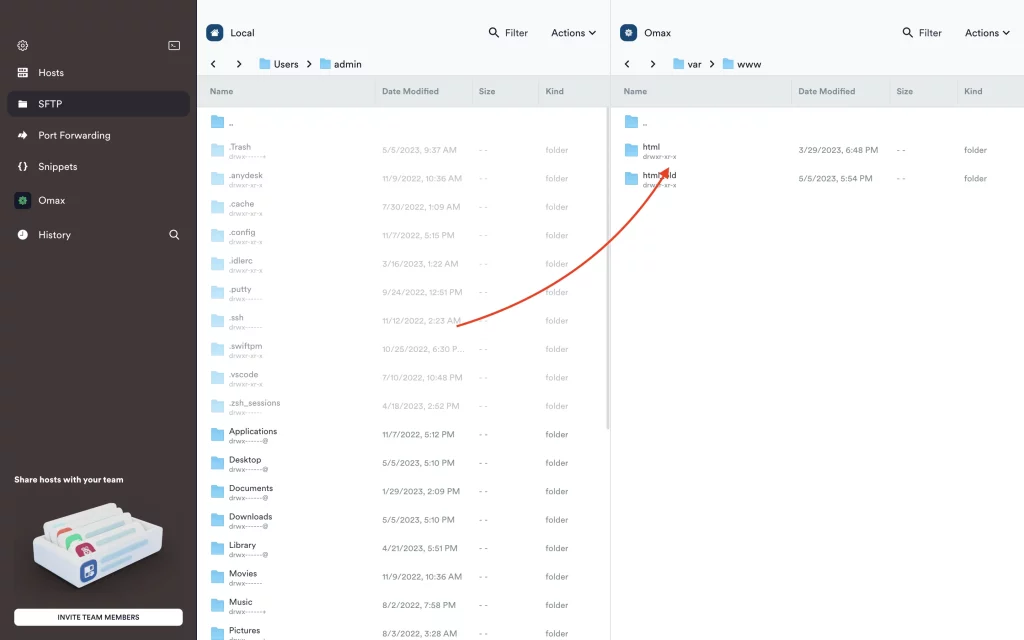
Now move the extracted WordPress folder to the upper directory by dragging it to the top or by running the following command:
sudo mv /var/www/html/wordpress /var/www
The above command moves the WordPress folder to the var/www folder or directory. Since the html folder and the WordPress folder are now in the same directory, rename the html folder to another name say html-old, and the WordPress folder to html since the WordPress folder is your website.
Open the WordPress folder which is now the html folder to edit the wp-config file.
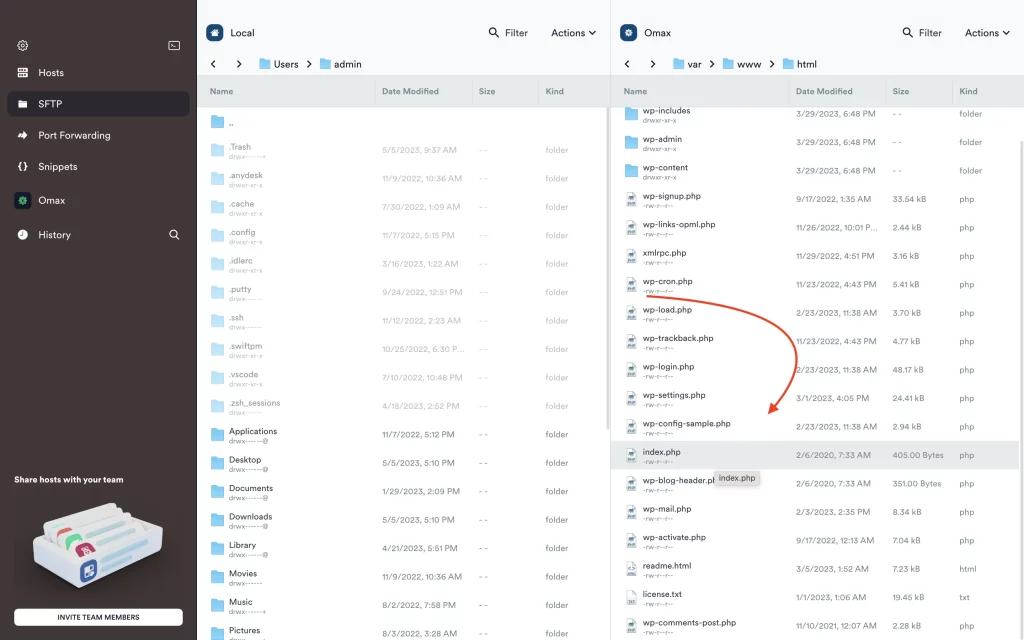
Edit the file by running the following commands:
cd /var/www/html
This will take you to the directory where the wp-config-sample.php is located in the command line. Now run the command to edit the file
nano wp-config-sample.php
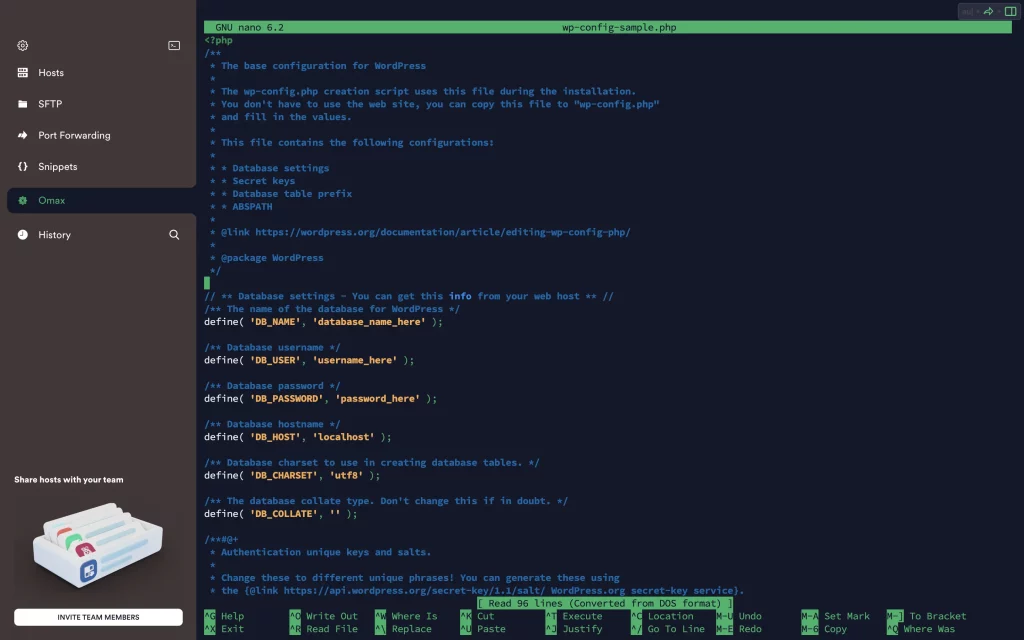
Use the up and down arrow to locate and edit your database name, database user, and password. You already have these details when you created your database in MYSQL.
Once you are done with the change, press CTRL+X to exit the nano command. You will be prompted to save the changes you made to the file. Press “Y” to confirm changes made, then hit enter and you will be out of the file.
Now we have configured WordPress successfully BIG CONGRATS
Apache configurations
We’re almost done. we need to configure the Apache webserver to be able to access our site through our domain name. To do this, navigate to the following directory in your FTP client /etc/apache2/sites-available/
Create a new empty file and call it yourdomain.conf. Pls, understand you are naming this new empty file to your main domain name dot the conf extension.
Open the just-created file and paste the following content on it, change all values to your domain name, and save the changes:
<VirtualHost *:80>
     ServerAdmin admin@domain
     DocumentRoot /var/www/html/
     ServerName domain
     ServerAlias domain

     <Directory /var/www/html/>
        Options +FollowSymlinks
        AllowOverride All
        Require all granted
     </Directory>

     ErrorLog ${APACHE_LOG_DIR}/error.log
     CustomLog ${APACHE_LOG_DIR}/access.log combined

</VirtualHost>
Now let’s see how we can do this on the command line: Navigate to the directory where you want to create yourdomain.conf file by running the following command:
cd /etc/apache2/sites-available
Run the below command to create yourdomain.conf file
nano yourdomain.conf
You will see an empty file. Then copy the below code and paste on the empty file
<VirtualHost *:80>
     ServerAdmin admin@domain
     DocumentRoot /var/www/html/
     ServerName domain
     ServerAlias domain

     <Directory /var/www/html/>
        Options +FollowSymlinks
        AllowOverride All
        Require all granted
     </Directory>

     ErrorLog ${APACHE_LOG_DIR}/error.log
     CustomLog ${APACHE_LOG_DIR}/access.log combined

</VirtualHost>
Note: Make sure to replace the above domain Values with your own domain name
Use the up and down keys to navigate to the domain values and change them to your own domain name.
To exit the nano command used to create the conf file, press CTRL+X then ‘Y‘ then the enter key and you will be off nano.
Enabling Apache configuration and restarting the service:
Simply run the following commands:
sudo a2ensite domain.conf
sudo a2enmod rewrite
sudo systemctl restart apache2.service
Remember to replace the first command with yourdomain.conf
We’re almost done trust me
Configure the WordPress Directory
We really need to adjust some items in our WordPress directory before we open it.
Adjusting Ownership and permissions
One of the cool things we got to do is to adjust to reasonable file ownership and permissions.
To make sure your website runs smoothly and can be updated automatically, assign ownership of all files to the user and group that your Apache webserver runs as www-data. This enables Apache to read and write WordPress files, allowing it to serve your website.
These ownerships and permissions can be updated with the chown commands:
Run the following command:
sudo chown -R www-data:www-data /var/www/html
Now run the following two find commands to set the correct permissions on the WordPress directories and files:
sudo find /var/www/html/ -type d -exec chmod 750 {} \;
sudo find /var/www/html/ -type f -exec chmod 640 {} \;
Setup WordPress Config File
Here we are making changes to the WordPress main config file (wp-config)
Upon opening the file, our top priority is to enhance the security of our installation by adjusting some secret keys. To ensure top-notch security, WordPress offers a secure generator for these values, so you don’t have to come up with them yourself. Since these values are used internally, using complex, secure values won’t affect usability.
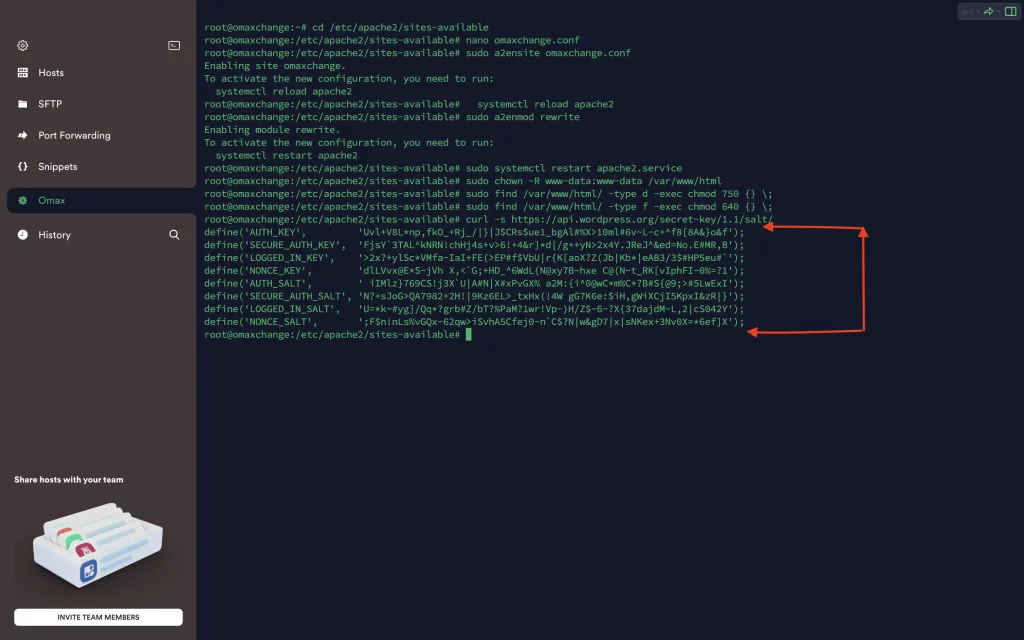
To get secure values from the WordPress secret key generator, run the following command:
curl -s https://api.wordpress.org/secret-key/1.1/salt/
define('AUTH_KEY',         'Uvl+V8L*np,fkO_+Rj_/|}|J$CRs$ue1_bgAl#%X>10ml#6v~L-c+^f8[8A&}o&f');
define('SECURE_AUTH_KEY',  'FjsY`3TAL^kNRN!chHj4s+v>6!+4&r]*d|/g++yN>2x4Y.JReJ^&ed=No.E#MR,B');
define('LOGGED_IN_KEY',    '>2x?+ylSc*VMfa-IaI+FE(>EP#f$VbU|r{K[aoX?Z(Jb|Kb*|eAB3/3$#HP5eu#`');
define('NONCE_KEY',        'dlLVvx@E*S-jVh X,<`G;+HD_^6WdL{N@xy7B~hxe C@(N~t_RK[vIphFI-0%=?1');
define('AUTH_SALT',        ' iIMlz}769CS!j3X`U|A#N|X#xPvGX% a2M:{i^0@wC*m%C*?B#S{@9;>#5LwExI');
define('SECURE_AUTH_SALT', 'N?+sJoG>QA7982+2H!|9Kz6EL>_txHx(!4W gG7K6e:$iH,gWiXCjI5KpxI&zR|}');
define('LOGGED_IN_SALT',   'U=*k~#yg]/Qq*?grb#Z/bT?%PaM?1wr!Vp-)H/Z$~6-?X{37dajdM-L,2|cS042Y');
define('NONCE_SALT',       ';F$n!nLs%vGQx-62qw>iSvhA5Cfej0-n`C$?N|w&gD7|x|sNKex+3Nv0X=*6ef]X');
You will get something like the above I showed.
To configure secure keys easily, use the auto-generated configuration lines and paste them directly into your configuration file.
Now open the wp-config file with either your FTP like WinSCP, termius, or via command line and update the file with the above auto-generated lines.
Run our usual directory command to open the wp-config file
cd /var/www/html
nano wp-config
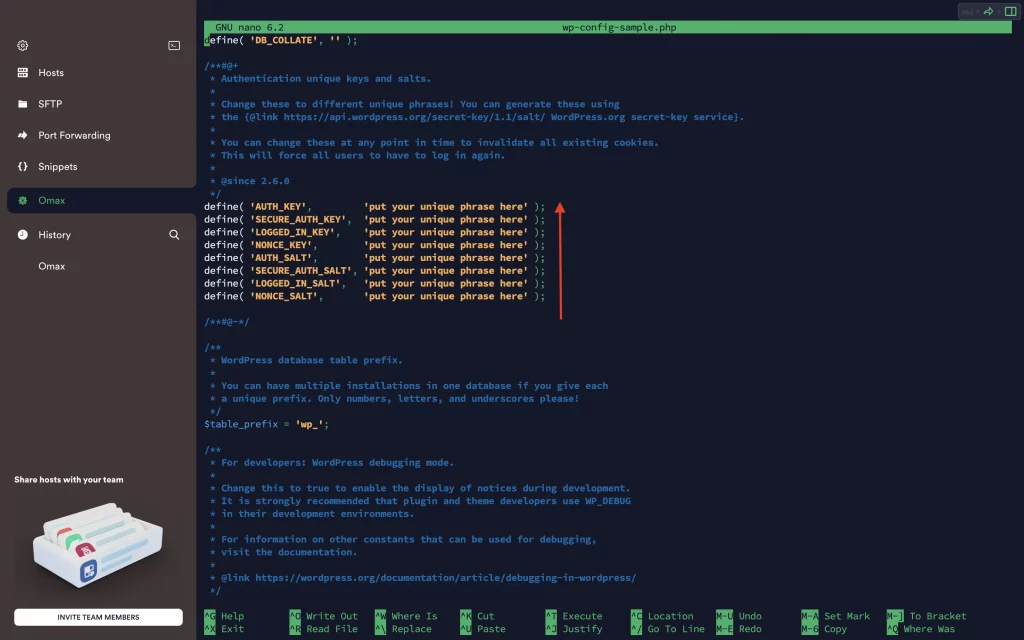
Use the up and down arrow to update the wp-config file. Press CTRL+X, then ‘Y’ then hit enter and you will exit the saved file.
Complete the installation through your domain name
Since all our configurations are all set, we will complete the installation via the web interface. Visit your server IP or domain name and you will be brought to the installation interface just like below:
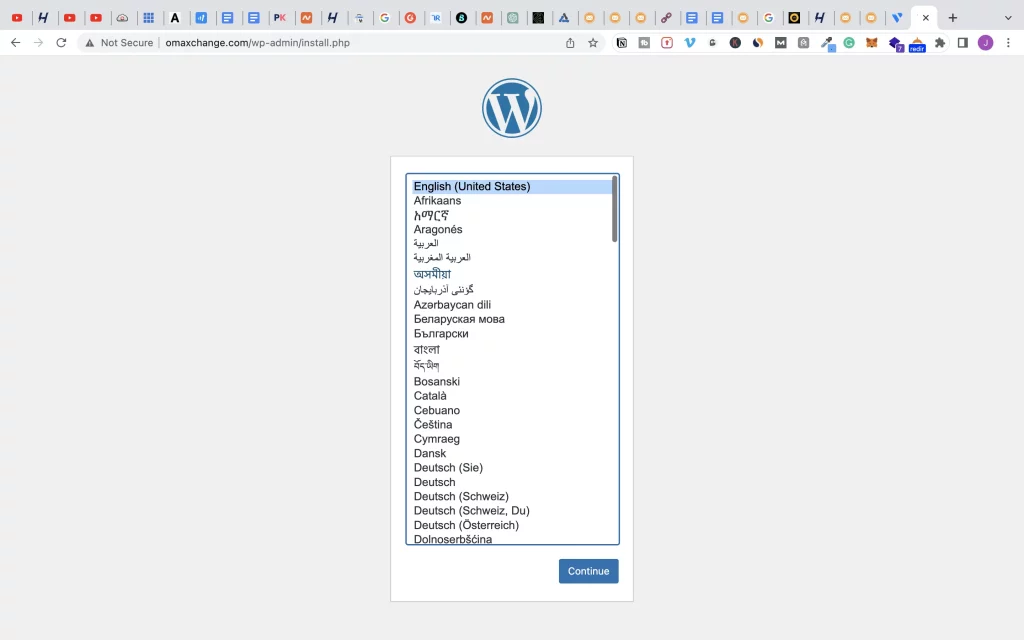
Select your language and click on continue. Then you will be prompted to supply your database credential. Just supply them and continue.
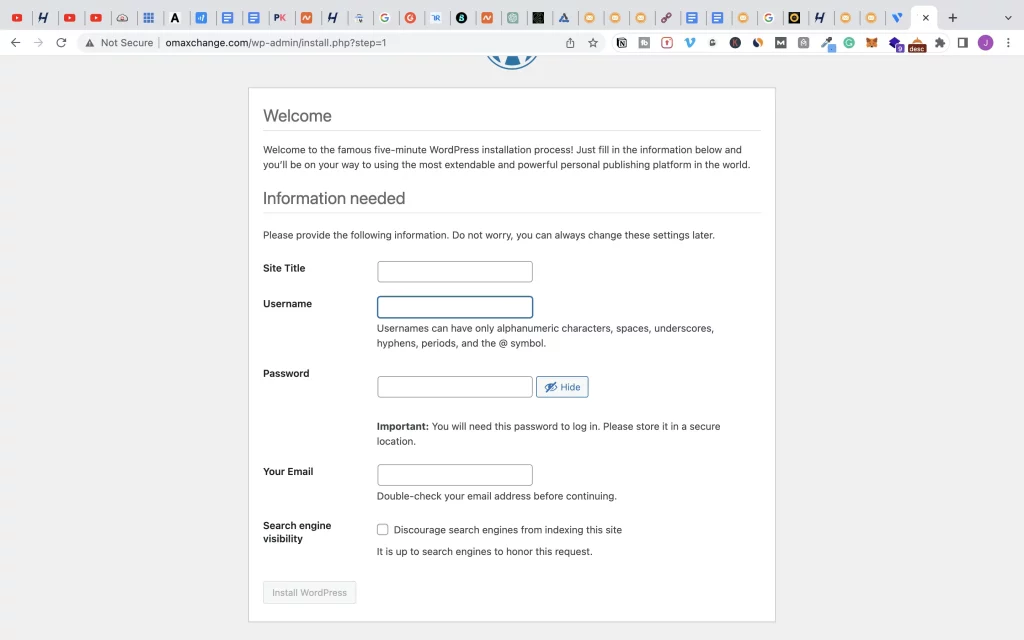
Put your site title, username, password, email, and all necessary credentials. Hit install WordPress, and WordPress will be installed for you.
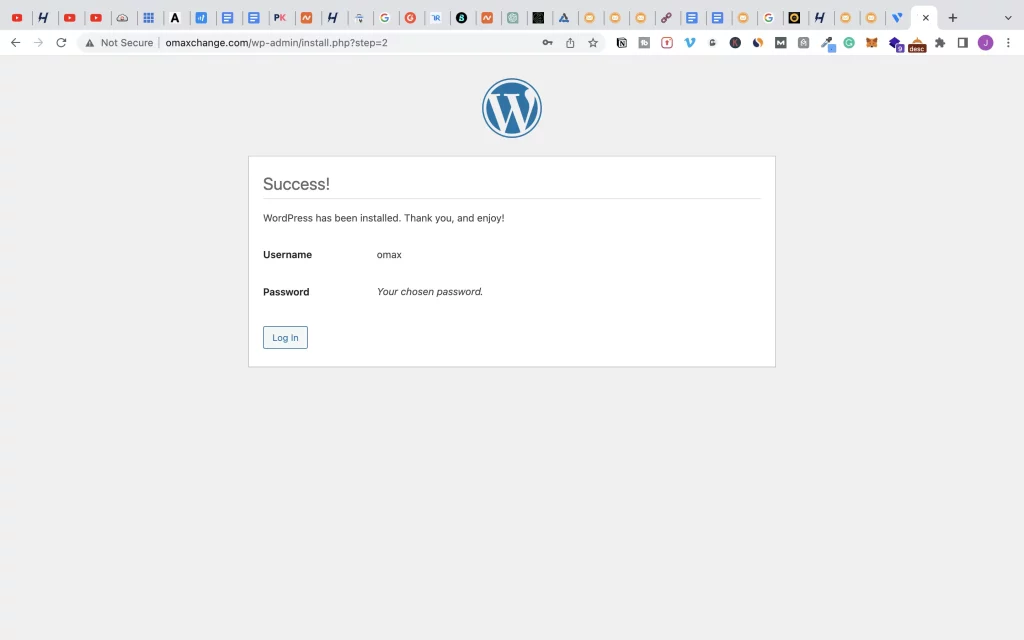
Click on login to access your WordPress admin area.
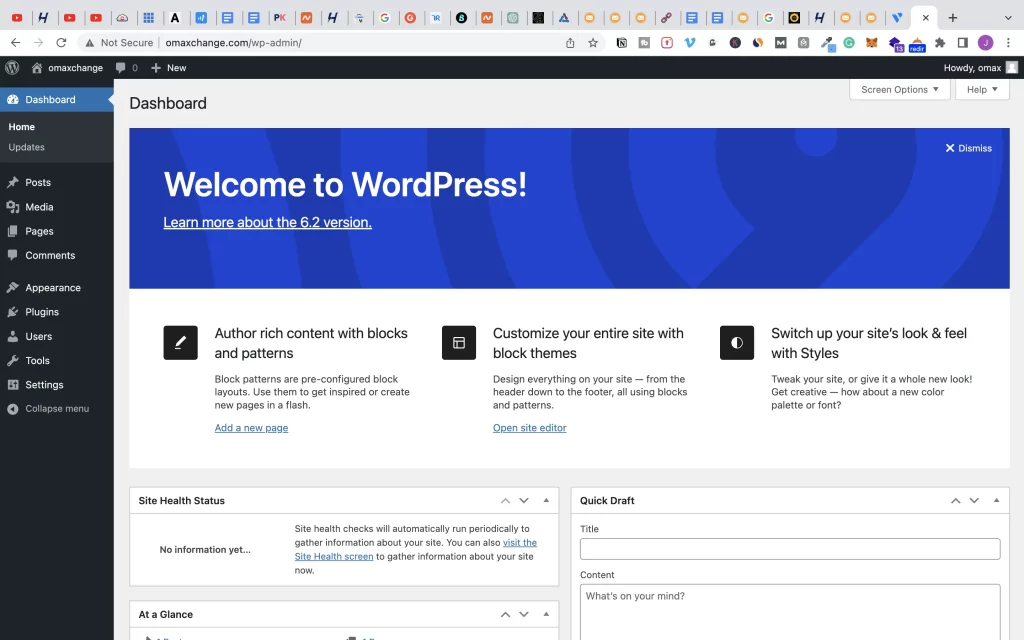
Congratulations you now have WordPress installed on your Contabo VPS. If you look well you’ll see that our website isn’t secured with an SSL certificate. Let’s see how….,
Secure WordPress Site with SSL
To make things simple, an SSL certificate is the key icon that shows your visitors that your website is secure. This makes your site visitors at rest that your site is genuine hence, increasing user experience and retention.
Also, in the quest for the search engine to protect their users, SSL certificates have been adopted as one of the criteria for indexing. The implication is that search engine gives ranking preference to websites with SSL over those that don’t. So, you have to configure SSL really.

To install and force SSL on your site go to the WordPress repository and search for a plugin called Really Simple SSL. Install, activate, and run the installation prompt.
We have really come very far and we are gonna end it here. Don’t forget to ping me via email or comment section if you have any questions.